Saturday, October 23, 2021

Dutch Tool Chest has a lid and plane till.


I decided to leave one side rough.  I didn't have a wide enough board so I glued pieces together.

The bottom piece was cut from a log by chainsaw.

The middle was riven from the log.

The top was also riven and is tiny.

I didn't make the top section quite tall enough for a flat top.

I'm adding a few inches of riven & sawn oak underneath.


Positioning the pieces before trimming and nailing.


And the side.

I haven't figured out the angles yet.


Here is the finished lid.


With hinges.  I love the ray flecks in the oak,


What is a plane till?  It's where you store your planes.

Usually they are angled like this one I made and was using.  Some are vertical with cleats to hold them flat to the wall.  

 Here are the #5, #6 and #7 planes.

Inside the tool chest, you have less room to angle the planes so I built a till.

I have walls going from the left of the DTC to the ends of the plane.

A roof is across the plane toes so I can have more storage.

To keep the plane blades from dinging up the DTC, there is a wood bar under the heel of the #5 at the back to the front of the DTC.  At the toes there is another bar with a cut out in the bar with a flat cap to keep the planes from bouncing up.

The bars are notched for the walls.  The walls are nailed and glued to the bars and roof.  It's not connected to the DTC but friction & wedging holds it in place.  The #7's front knob lifts the roof when taking it out and it needs the whole length of the chest behind it.

The DTC is ~ 12" deep which is just right for my #3 and 2 #4s.  

One of the #4 is a Harbor Freight ($15?) modified to be a scrub plane.  I filed the mouth larger believe it or not.  The stock blade stays as sharp as a wet paper bag so I bought a cheap Calistro blade for $5.  I cambered it heavily.

Between that and having a heavy camber on the #6, I can remove quite a bit of wood to initially flatten raw wood.

Tuesday, September 7, 2021

Drawbored mortise and tenon coffee table base

 One of the things I've made (am making still... ) from the oak that I rived is a coffee table.  I applied what I learned reading Make a Joint Stool From a Tree from my favorite woodworking publisher, Lost Art Press.


The hardest part was getting the right dimension from the wood.  It was my 1st time riving, I made slabs instead of splitting in half every time.  If I had the length, the thickness might not be enough and so on. 

I was trying to be frugal with the wood and made my initial milling too small.


I persevered and produced the legs, aprons and stiles.  The legs needed 16 mortices.  I chopped them all by hand with mortise chisel and mallet.  I didn't drill them out at all.

The wood is still green, making things a bit easier.


Here is an end with the undrilled tenons inserted into the mortises.

I'm marking the mortise holes onto the tenons.


The tenon holes are drilled 1/16" closer to the shoulder than the mark.  This is what drawboring is about.

When the peg is driven through the mortise, tenon and out the other side of the mortise, the offset will pull the shoulder tight against the leg.

You shouldn't need glue, the peg will hold it.


The pegs need to be tapered.  While the legs and stretchers are green, the pegs should be dry.

They will absorb moisture from the green wood and swell.


The peg actually bends as it goes through the joint. 

This will hold, without glue, until you cut the joint apart.


Here is an action shot of the peg before I cut the ends off.


And this is the assembled base.

2 years later and it's still tight and not splitting or pulling apart.  You don't have to use completely dried wood.

Sunday, July 11, 2021

Dutch Tool Chest Begins

 I have a pegboard on the other side of my bench.  It swings so I can get to the back.  I have a stand with a magnet for my chisels.

To my right, I have a plane till with #3 - #6, 3 block planes, a scrub plane and an extra #3 and #4 planes. Underneath I made a rack to hang my 3 cordless drills. My #7 hangs from the ceiling on a rope.  

Also hanging are 3 brace bits, a ryoba saw, a folding dozuki saw, my 16" and 12" combination square, my bevel gauge, and 2 12" steel rules.  All my clamps are hanging or clamped to joists.

Behind me is a box with all my sharpening jigs, diamond stones, strop and other sharpening things.  I have wire basket drawers with files, plow plane, router plane, side rabbet plane, drawknife and some hatchets.  There are also some power tools, granite plates, files, jigsaw blades in some baskets.  On top of it is a set of plastic drawers with drill bits, dowel jigs, bolts, nuts, screws and other things.

Finally some tools are scattered across the bench, in the way when working or put away on the pegboard.  Usually at the end of they day so they're always in the way.

I need something different.  Something to protect my valuable tools from dust (which becomes rust).  If a pipe bursts, it will get the tools wet.  A dutch tool chest will fit my hand tools.  It's small enough I can mount it on the wall in place of the pegboard.

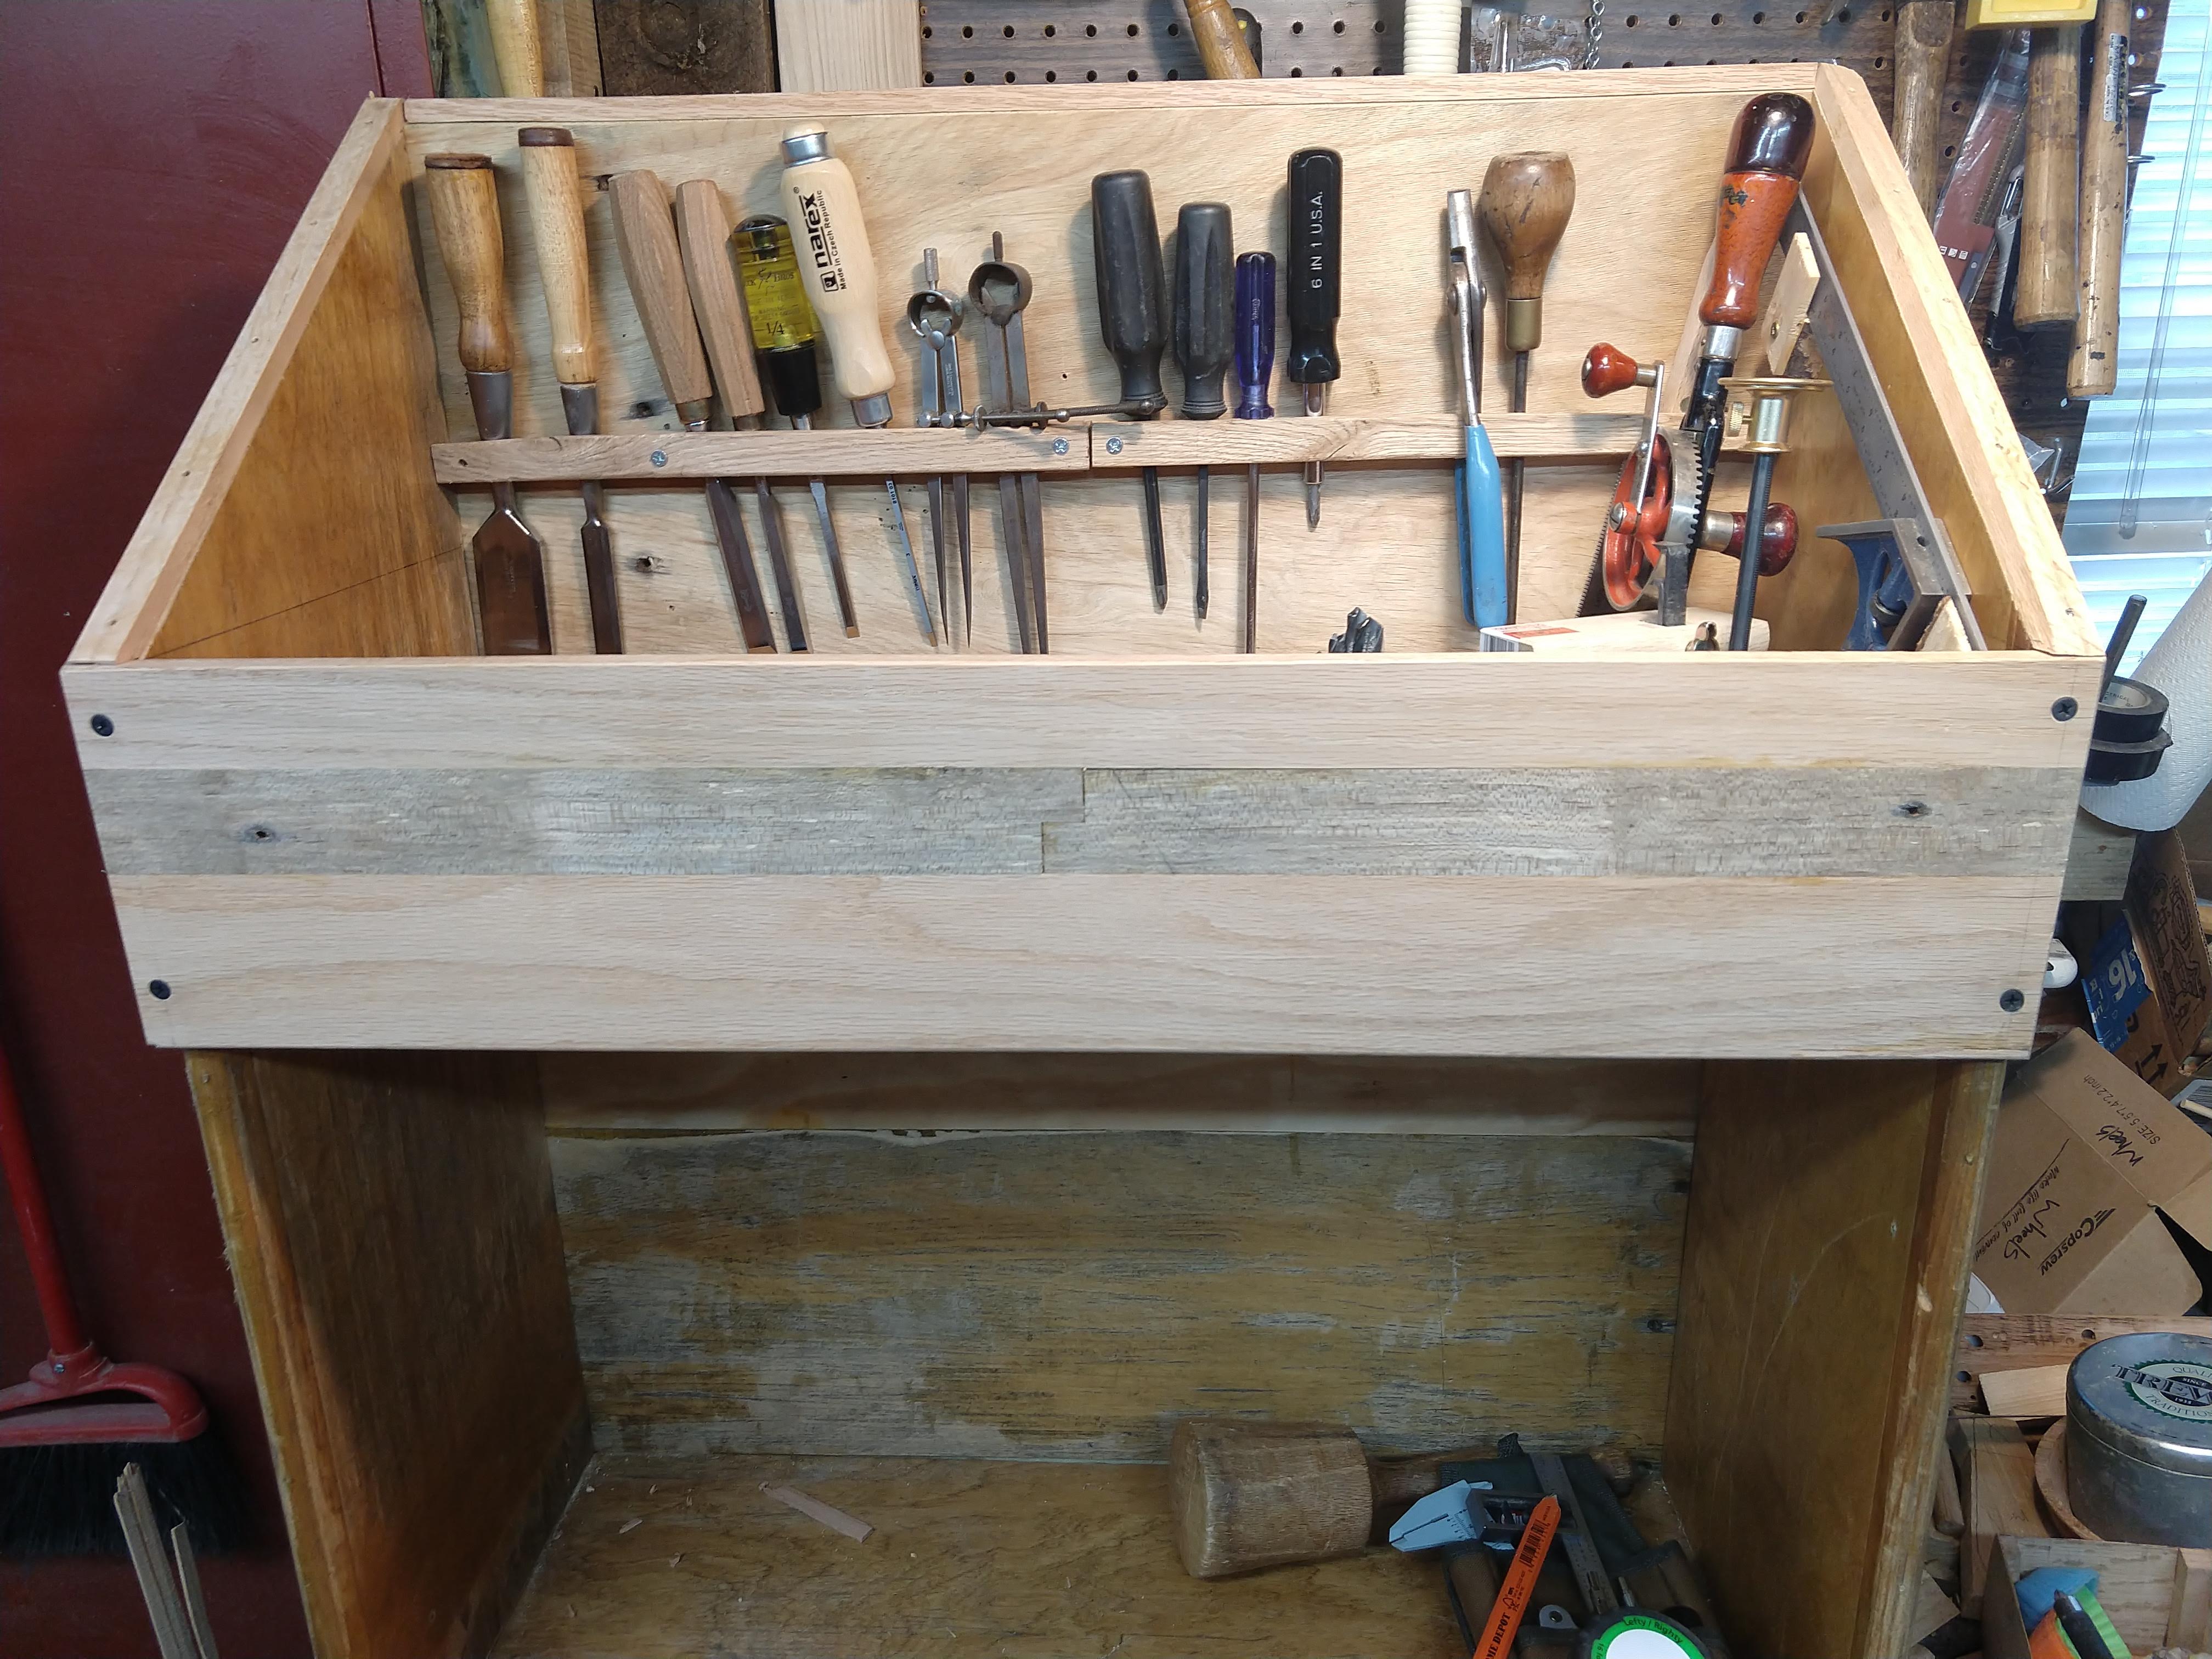
Here is the start.  I have leftover, salvaged plywood for the carcase.  For now, everything is screwed together to make it easier to add shelving to the bottom.

The front, lid are oak from my logs.  The dark wood is from a pallet.  I think it's walnut. The interior rack are bits are also oak.  Some pieces are pine from fallen branches.
I have all my chisels, screwdrivers and some other things in the rack.  My 12" combo is on the right with some hammers. A dead maple branch with holes holds my Miller Falls #5 eggbeater drill and a marking gauge upright. You can see my #5, #6 and #7 planes on the floor. 

Finally, a belt pouch with 6" double square, pencils, marking knife, calipers and a tape measure.  So I don't leave things on the bench while I'm working and always have them at hand.

So far, it's already been helpful in lessening the chaos.

The shelves in the bottom will be determined by the way I store my other tools.  I'm planning on:
  • My #3, #4 and scrub plane on the bottom floor
  • My speciality planes near them.
    • Boxes for these planes
  • A box with 2 sizes of braces and a set of bits.  The thickness will determine the shelf height.
  • Saws on the lid underside.  Ryoba, folding dozuki, coping saw.  There will be room for other tools on the lid
  • Marking gauges
  • A sharpening station box instead of the cardboard one I have now.
  • Small boxes that might have lids to hold grouped items together.
Just as important as what is in the chest is what is not:
  • Mallets
  • Clamps
  • Power tools
  • Hardware
  • Consumables
I'm going to try to use the oak and pine from my logs as much as possible.  The lid will be pretty interesting and unusual.


Monday, May 31, 2021

New Leg Vice

 I've tried a number of different vices on the bench.  I used pipe clamps and a 2x piece of douglas fir.  

The 1st was a parallel (moxon) vice.  I got tired of dealing with racking.

Next was a leg vice.  The pipe clamp slipped so I moved on.

A cheap 6" vice from the internet was pretty good for awhile.  I bought one with a dog to use with a line of dogs on the bench.  I used it once or twice.  Perhaps if I ever install it as a tail vice I'll use it.

I bought a 1-1/2" thread box  to build an angled leg vice. 

The screw (maple) & nut (oak). 

The chop is oak.  I'm using a different pipe clamp in my old leg vice which improves it.

The new vice in action.  It's angled.  I glued leather onto the chop to add some grip.  It adjusts racking to whatever you're gripping.  It's about the same width as my cast iron vice was.  I haven't angled the top yet.  If I don't need to, I won't.

At the base, instead of a pinboard, I use a wedge I move with my foot.  I have a mortised & tenoned block to keep the vice from twisting.  Underneath it, I have some wheels.  I may add a wheels above it and that could allow me to get rid of the wedge.  

So far, the wedge works well.  Since the bottom of the chop is beyond the bench leg, I have a 2x4 on the flood going back to the wall to support the wedge.  If my bench wasn't against the wall, I'd need a different solution.  I think my next bench will have angled legs so there is something for the chop & wedge.

It doesn't have a garter so I have to move the chop back out as I unscrew it.  I don't move things much in use so it's not an issue.

I'm happy with the wooden screw.  It's noisy but getting quieter as I'm using it.   I wish I had gotten a threadbox with lower TPI so it would be faster, but not enough to redo things.

I have to wonder why the cast iron vices became popular.  The leg vice just works so well.  Even without angling the depth is more.

I plan on making a moxon vice with wooden threads. I have a 3/4" threadbox with a lower TPI that will be faster as well.  Maybe as part of a bench on bench for dovetails and mortising.


Sunday, April 25, 2021

Miter Box

 I went to a used tool shop to get a used 9-1/2 block plane.  While I was there I saw he had a used miter box for $70 but didn't get it.
 
 I've been thinking about miter boxes.  
Not the plastic junk or the wooden ones, but the ones they used to make.  

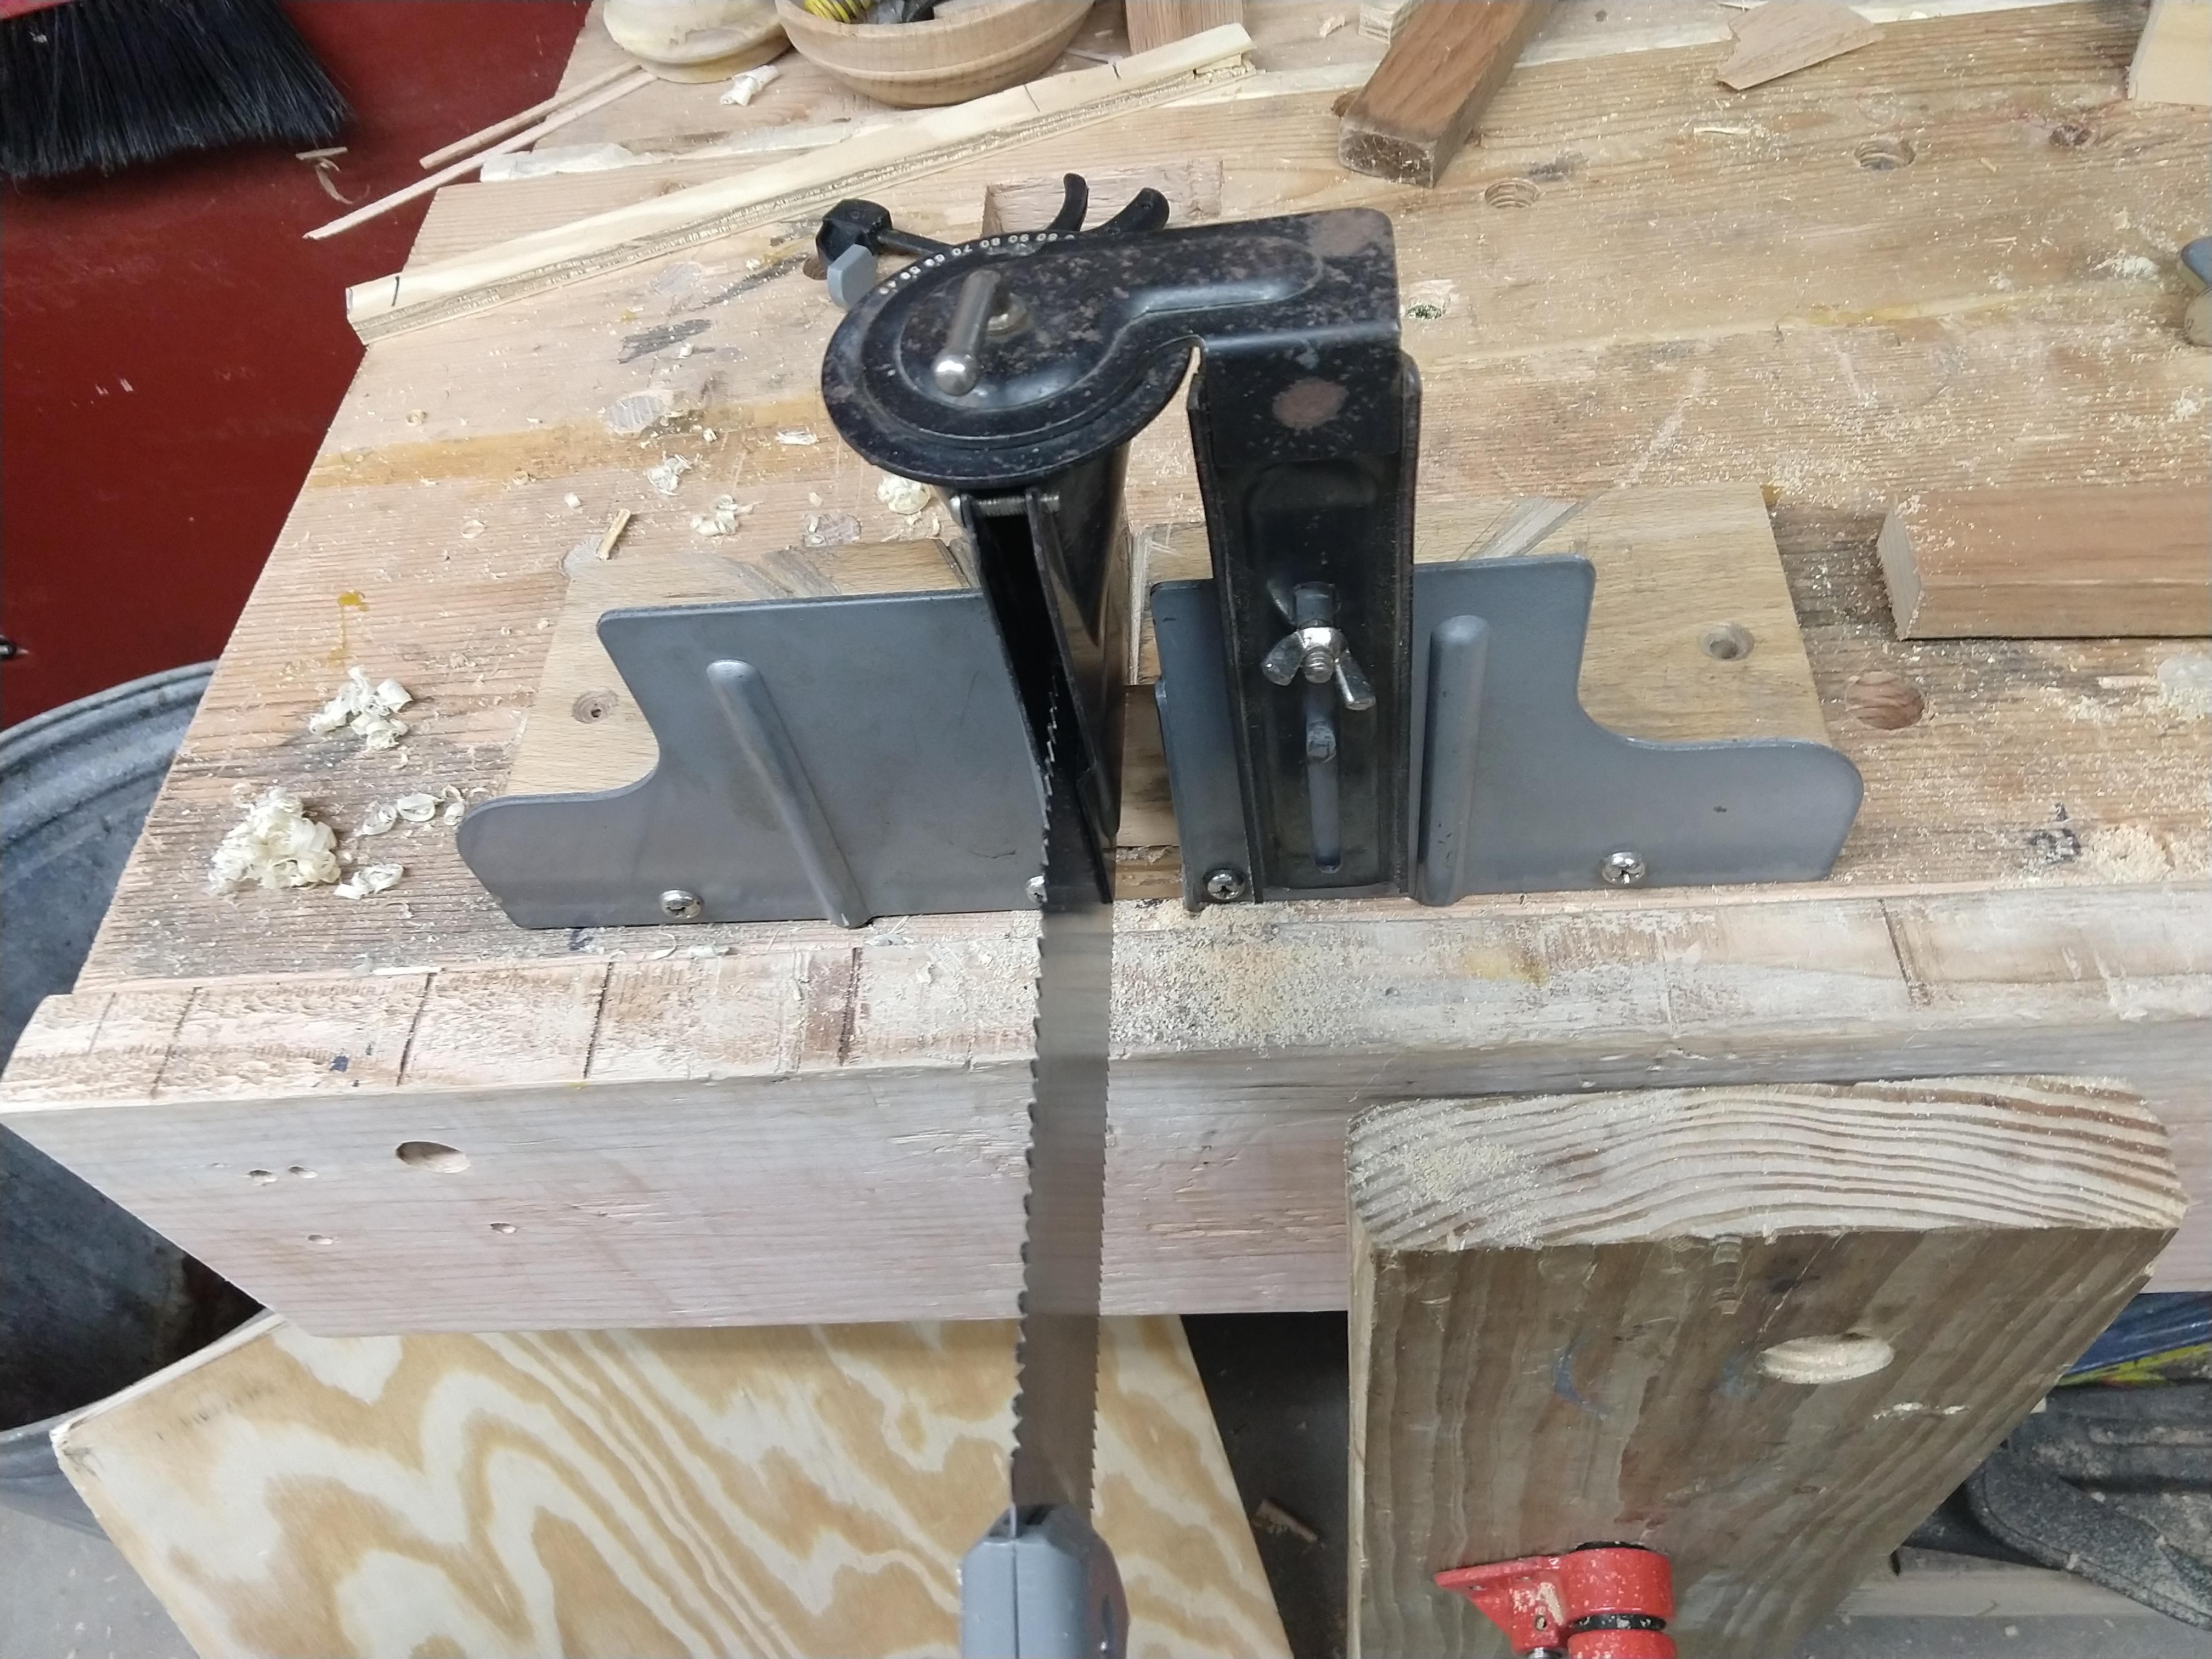
Like this one I had gotten earlier and blogged about.  This is a low end one and it works much better than the plastic boxes.


This is what the high end miter box saws looked like.  They would come with a back saw.  Most of the makers stopped making or went out of business.
The Ulmia miter box is still being made, along with parts.  Amazon carries wood & metal blades.  This is their top of the line model.  It is cast iron and weighs 40 lbs.  New, it's more than 10 times what I paid. 

It works very well, cutting easily through pine or oak as I have here.  The Ulmia is worth having.  It's quick, quiet, accurate, and doesn't put dust in the air.

I squared up some boards.  These are the offcuts

There is a penny in the jaws of one of the wrenches.


A penny is 6/100" or just under 1/16" (1.54mm).  The larger offcuts are 13/100" or just over 1/8" (3.3mm). 

Try that with the plastic junk.  Or even with a power miter saw.


Wednesday, March 17, 2021

Wooden Screw


I'm using a thread box and tap to make a wooden screw for a leg vice.

It's a 1-1/2 maple dowel that I soaked in mineral oil for many days.

  
When cutting, I use coconut oil which helps the chips clear. 

When tapping, it's critical and you need to go forward and back to clear chips. 

The hole is 1-3/8.  After I threaded it, I cut the nut out. 

I should have flattened it before drilling to ensure the hole was square to the nut.  A bit of sawing & planing got it close enough to use for the leg vise to replace the pipe clamp one I'm using here.


Sunday, February 21, 2021

Miter Box For Japanese Pull Saw

 Most of the time, I just saw w/o a guide.  Sometimes I want to use a miter box.  I've tried to make one but they didn't work well.

I was looking at vintage miter boxes, not the crappy plastic ones that are sold now and I saw this https://youtu.be/BZI0qgLfkms on youtube.

A Stanley 116 miter box was (& still is) cheap.  It's much better than the plastic or wood ones (IMO) and it works with any saw.  So I bought one on eBay for under $20 & it was even in the original box.


It's limited in the thickness it can cut, but that's ok.  It can do at least as thick as the plastic ones.

You sight down the saw holder to see your mark.  It it's off by 1/64, you can't see it.  It's very easy to position and the cuts in the wood don't matter.

I use clamps to hold the stock and maybe hold it to the bench.

I need to add a sacrificial board or just replace the board.


If you turn is around, the pull keeps it against the fence.

The cut is straight, vertical and accurate.

If you need exact, take it to a shooting board.