Saturday, March 9, 2024

Staked furniture

 It's been awhile.  I've been reading lots of Chris Schwarz and his Anarchist series.  Great books and I think 2 are also available as a free download. The physical book is quality and there's a story  of  one surviving a flood.  They're not cheap paperback; they'll last a centuryor more.

I've wanted to build a chair or stool.


Wheelwrights used to use a spoke pointer, on the right and a hollow auger on the left.

You set the blade on the hollow auger to make a size up to 1" or so.  It will cut the stick to that size,but you need to taper the point so it fits.


I have lots of choke cherry that grew on the fence line.  After you cut down, the stump will send up new shoots.  Doing it on purpose is called coppicing.


These sticks are 4 years of growth and 1-1-1/2" around at the base. Its almost thick enough to make spoons.


The board I glued together is from older trees that were 5"-6" around.  It may also regular cherry that I found.

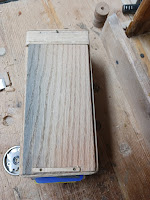
 It was supposed to be a stepstool, but it creaked when I stepped on it.  So its a plant stand.


The stick that has no bark on it in the middle picture split after 2 week.  One of the issues with choke cherry

Monday, June 12, 2023

The wheel hoe for weeding

 Hoeing with a sharp blade is a good way to deal with weeds.  I see an oscillating stirrup or skuffle hoe get recommended.  


Put it on a wheel and push it and you have a wheel hoe.

The hoe blade is thin.  You push it along a few inches under the soil and snip off the weeds underneath.


It works best when the weed is still a seedling.


For the wheel hoe, you just push forward on the handles.  The blade is easy to keep a few inches under the soil.


For this year's garden, I have 15 rows that are 18" apart and 18-ft long.


With the wheel hoe and an 8" blade, I need to make 2 passes on each row.  I was able to do my whole garden in 15 minutes during my lunch break!

A regular hoe would probably take an hour.


Before WWII, wheel hoes were sold widely in the US.  The most common was the Planet Jr. which sold up until the 70's or 80's.  

A few companies have started up in the US selling them for $300 or more.  Most are copies of the Planet Jr.  Most can use attachments from the Planet Jr and their attachments will work on the old wheel hoes.

Someone else starter making kits & plans to make your own under $100.  The Planet WhizBang plans are still for sale if you want to go that route.

Wheel Hoes are still made and used in other countries.

I'm cheap so I decided to figure out the dimensions myself.

1) the wheel should not be large.  10" to 14".  The smaller wheel puts the force at the tool.  The larger wheels reduce the force the tool puts into the soil and focuses it on the wheel.

I bought a plastic wheel at a hardware store for $10.  It's 11" or 11.5".  I think it was a replacement for a cart or lawnmower.

I bought 1"x 1" angle iron.  I think the thicker (3/16" thick). From the center of the wheel to the start of the block is 6"-7"


The block needs to be very rigid and stiff.  

For the DIY hoes, some use a steel tube, some use a steel I beam.  I have lots of oak because of my wood working.  I suppose you could use a steel pipe.

My block is 5" wide, 6" long and 3" thick.  I think the steel ones were smaller.  I wish I made it thicker.  Shorter would be ok too.


The angle iron (1" x 1" ) is about 2" beyond the block.

The 2 angle irons are ~ 15" long.

You could cut with a hacksaw or an angle grinder.  I used a jigsaw with a metal cutting blade.  It actually left a smooth surface.

Just cut one side down to the angle and repeat with the other side.  Then you have a short intersection between the cuts to finish


The wheel has a 1/2" diameter axle.  Its just a metal liner, not a bearing.  It will wear out

To space it left to right, I had washers and old 1/2" black iron pipe to fit.  The washers reduce the friction.

I drilled the hole in the angle in steps.  I started with a smaller bit, then a medium bit and the final bit.  Use cutting fluid or oil (3 in one?).  Drill one side, clamp the other angle to it and use that as a template.

I also sharpened my bits on my diamond stone.  This made them cut through like butter.  I also used a drill press.  You can use a hand electric drill if you can press down from above.

The holes for the sides through the block I used 3/8" bolts and  then drilled metal with 13/64th to give clearance.  The oak doesn't need the clearance.

The important thing is to get everything lined up & straight.  One of the holes in the wood was off a bit.  I had to oval it our to fit to the metal.  You want it to be as stiff as possible.

I attached another piece of angle on the back to make a platform for attachments.  This is a bottom view.

Then 2 ears of 2"x 2" (thinner) angle with lots of holes to adjust things.

I have lots of 3/4" long 1/4-20 bolts so I used that.  I used lock washers under every nut.

I have 1" x 3/16" flat steel for the arms of my stirrup.  The stirrup is a piece of bandsaw blade.  I cut the teeth off with sheet metal cutters.  You could use a hacksaw blade as well.

I used smaller bolts to connect the blade.  It is hardened and difficult to drill.  A stepped drill bit or a masonry bit might be easier.

The handle is bolted to another piece of flat steel.  It pivots on the bolt through the block.

I have a piece of galvanized flat stock w/ holes already in it to hold the angle.  It bends like butter, but everything else is pretty stiff, so its ok.  One end is on the handle bolt.  The other end is attached to the block with a construction screw.  I predrilled a hole and still snapped off the first screw head in the oak.

If I had more flat stock, I would drill and use that.  I'd try to use the existing bolts instead of a screw into the wood.

The handles are oak. 5/8 thick x 1-1/2" wide.  

I measured 36" from where the handle attached.  Then I measured from the floor to just above my belt to get 41" for the ends of the handle.  The 50" comes from solving the right angle triangle.  For me this is just under 50".

But they splay out too.  That is a trapezoid.  5" wide at the front and 26" at the back with equal lengths.  With ~ 50 inch arms, I get a 102 degree angle at the front and 78 degrees at the back.

I just needed to create spreaders to keep the angles.


I have lots of Choke Cherry trees grow up in my yard, next to the fence.  Birds eat the seeds, sit on the fence and sometimes they "plant" seeds.  When you cut the trees, they will grow back, fast.  People used to do this on purpose called coppicing with lots of species.  Willow & others for basket weaving, alder for making fence, hurdles and walls for wattle & daub.  The could get kindling and make charcoal too.

That means I have lots of cherry that is up to 4 inches in diameter.  Most of it is under 2".  It takes 1 to 2 years to get 1" diameter.

I decided to use the staked furniture method (see Rex Krueger's video on a staked stool).

My tenons are 7/16".  With 1-1/2" wide oak, I can drill a hole that is less than 1/3 of that through the handles.  I used the whole stick and didn't split it down the pith and shape it.  I have lots of sticks and growing.

I created my tenon with a chisel & saw.  I drilled a 7/16" hole in a piece of hardwood and pushed it down on the tenon to check the fit.  When it stuck, it compressed the wood.  I shaved the wood below with a knife and tried the fit again.

Once that fit, I put it in the arms of my handles to fit, cut a slot, glued an wedged it in place.


I cut an angled 1/2 lap in a piece of 2x2.  One screw holds the handle to the arm.  I shaped everything to comfortably fit my hands with a spokeshave.


Finally, I put boiled linseed oil on everything & put it to use.


Sunday, June 11, 2023

Weeding Stupid

 I've tried different things to deal with weeds.

Trying to preventing them with 

  • plastic mulch & landscape cloth
  • Deep straw
  • cardboard
Once they're there, I try to pull them up.  But I need to be sure it's a weed & not what I want there.  Its easy when they're grown.

These are peas in the row

There are sunflower plants scattered about.

And lots of weeds.


Its better when they 1st sprout.

Looking at this, can you tell what is weed?

I think this is my cucumber row.


At this stage of growth, you need to be very smart.  You need to know what your plant looks like & what weeds look like.


That requires knowledge & skill which I haven't developed.  

So this year, I'm focusing on being stupid with weeding.  Because when it comes to weeds, farmers use stupid techniques and we should be stupid too.

Farmers don't pick individual weeds out from amongst the plants.  The don't have an expensive app that photographs & ids each plant.  They run a tractor down the rows with a stupid cultivator that cuts off any plant that is between the rows.  So there's no intelligence needed.

To do this, they need to plant precisely.  If a plant is in the wrong place, it gets cut off at the roots.

If it is a plant grown from last year's crop as a volunteer, down it goes.

I put string down the middle of the row & tried to get all my seeds right under.  Then, if I see a sprout that is too far from the line, I know it is a weed.

I also made a wheel hoe that I can push down the row & cut the weeds off at the roots.

Thursday, May 18, 2023

Making a seed planter from PVC pipe

 I'm getting back to the garden and decide to make (at least) one tool.


This is my seed planter.  I watched a bunch of youtube and came up with this.

Anyone can make it.  The basics you need are:

  1. A pipe.  I had some 3/4" PVC.  1/2" will do too.  Any material will work it it's not too heavy.
  2. A container to hold the seed up top.  It is just to hold your seeds until you pick them up & put them in the pipe.
  3. A stick to measure the distance between seeds.
You can duct tape the stick & container to the pipe so don't think you need fancy tools!

Most put a funnel on the pipe.  IMO you don't need that because you're going to drop your seed(s) in the pipe.

Many have a can or similar taped to the side of the pipe for seeds.  You pick a seed(s) from the container & put it in the pipe when you put the other end where you want the seed(s).

 I saw at least one that cut a hole in the bottom that squeezed tight around the pipe.  You put your seeds in the container like before, but if you miss the pipe, it falls into the container instead of the ground.  I had wooden box I had made for another project.


The bottom can just be open.  If you get dirt in it, you can shake it out.

Some people have a T connector to another pipe to put a hole in the dirt before they place the seed.  It makes the planter look like a lower case h.

Others have pointy end & a door to keep the dirt out.  The open the door to let the seed drop.

I decided to do the fancy door.

I have a piece of angle that is a long as my point.
It's attached with a hinge.  The weight of the angle will flap it down.

I have small screws to attach it to the PVC.  
I filed the ends inside the pipe so they don't interfere with the seed drop.  If you put something across the inside, the seeds can get caught.

I added a pipe clamp for strength.  The screws are to position it.


I used a jigsaw with a blade for metal to cut the width around the pointy part.  Then a file to remove sharp edges.

You could use a hacksaw.  The jigsaw left a surprisingly smooth cut.


I made a platform up top to put my container on.  The bolts clamp the wood around the pipe to keep it from sliding.  I could have used another hose clamp.  Or duct tape!  Or just have a plastic container tightly fit around the pipe.

The eye is to attach a string to my door flap.  I can push the point in, drop seeds and pull the string to open the door and let them on the ground.

Some people have a handle with a lever to pull.  I don't think you need it.

Unless you like playing with gadgets, I think a T with another pipe to make a hole is a better idea than the door flap.  Its much less likely to break or get in the way.


The T & pipe is used to measure the distance between seed. 

I don't have the T with a pipe to make holes so I connected a stick to the bottom.  My stick is 12" from the pipe to the end and I marked every 3".

A stick with dowels or something else to mark the dirt might be good too.


Saturday, April 1, 2023

Holder for my sharpening stones


 I had made one from pine, but I wanted to move a stone to the top & sharpen on top.

This one is oak  I have the xx-course at the bottom, honing & polishing stones in the middle and a rubber mat and leather strop in the other shelf.


Two stops to hold the stones in place for sharpening


I made it too short so I added some to the end.  It needs to be short enough that the stones stick out the end a bit but long enough to hold it for sharpening.


The shelves are boring maple.


I started with this and angled a plane on the bench to get


It was a quick build.  

I recently acquired a thickness planer which makes processing raw wood much quicker.  Its good enough that sometimes I don't need to touch it up.

Saturday, January 21, 2023

Pinch stick for measuring inside corners

 I use these for making sure my boxes are square before glue up.


I have all the flat bamboo sticks.  I think they're 2mm thick.


I was just using a clamp on them but that doesn't always work.

I made a mortise in a scrap of oak with a 3mm chisel.

It's a great chisel for cleaning out larger mortises too.


Some filing and I get a snug fit.
Then i drilled a hole and taped it with threads for a #6 machine screw and I have a my pinch stick.

Shooting with a Veritas Jack Rabbet Plane

I made the Donkey Ear shooting board in the last post


I needed sides on the plane to keep from tearing up the shooting board.

Plastic cutting board didn't work.  Its too thin.


So I made them from oak.  The heads of the screw are ~ 7mm.  I need something that I can counter sink more than that and still be thick enough to be held on by the screw.


The LA Jack is a great all around plane for most woodworkers.

With the sides, the LA Jack Rabbet plane is arguably the same plane.  It can do everything the LA Jack can do plus it can do rabbets.

For shooting, the handle tilts.  For mitering with a Donkey's Ear, you need to shoot in both directions and the handle tilts both ways.


I'm leaving the sides square because I can create a slot on the shooting boards it can ride in.

I'm finding I prefer my #5 Jack for bench planing.  I would probably prefer it to the LA Jack.  I'm glad I didn't get an LA Jack but I might use this for that purpose from time to time.

I've been shooting w/ my #7 and this is much better.  When I need to rabbet, this can do it.  if I have lots of end grain, this is it too.  Its cheaper than a shooting plane and can be left handed.